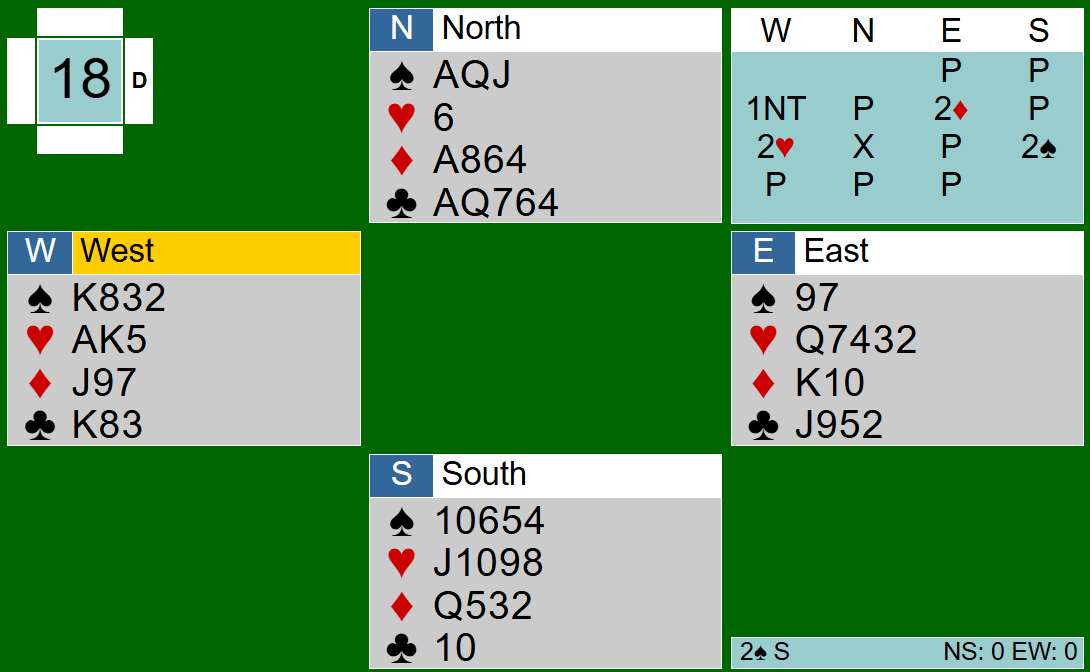
This deal (slightly modified) were played at a recent Regional tournament (matchpoint scoring).
In the first deal you have this wonderful collection, second to speak, no one vulnerable:
♠️ 10654 / ♥️ J1098 / ♦️ Q532 / ♣️10
East passes, you pass too, and West opens with a 12-14 1NT. Partner has a problem, but passes after a slight break in tempo. East transfers to hearts (by bidding 2♦️). West completes the transfer, but now partner decides to make a takeout double. You take it out to 2♠️, ending the auction.

West leads the ♥️A and this is your dummy:
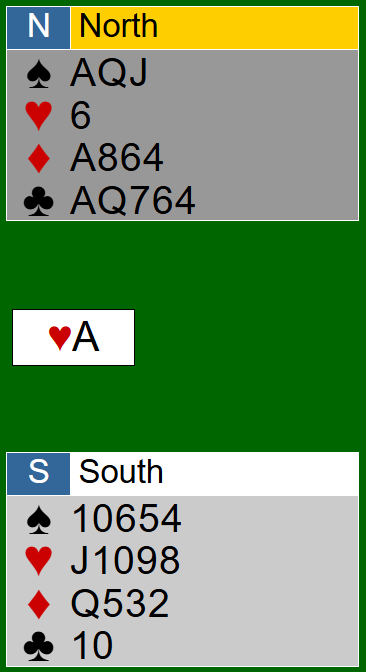
The lead is usually from Ace-King. West shifts to the ♠️2 after seeing dummy. The Jack wins as East follows suit with the ♠️7. What now?
You can hope for three or four spade tricks and two Aces. If the King of diamonds is onside, you will get one or two extra diamond tricks. There is also a club finesse in reserve.
As always, you should be mapping out the possible strengths of each opponent. West announced a 12-14 hcp hand. You have 20 hcp between your hand and dummy’s, which leaves 6-8 for East. Enough for him to have one (or even both!) minor suit Kings.
Since you want to secure entries to your hand, the best play at trick 3 is a diamond to the Queen. But the very best play is the Six of diamonds to the Queen, as you will soon see.
East hops with the ♦️K and plays a heart, forcing dummy to ruff. West follows suit with the King to that heart. It looks like West started with ♥️AKx, and East with ♥️Qxxxx. Spades might very well be 3-3, with West having a 3334 or 3325 shape, so you now cash the spade Ace, play a diamond (the Eight!) to your Queen, and try to break the spades. No luck. West had ♠️K9xx. He wins the Nine and the King as you discard clubs from dummy. Now he tries to lock you in dummy with the 3rd diamond, in this position:
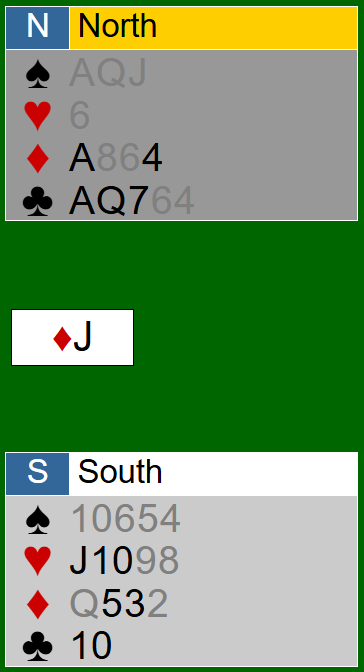
Now, isn’t that a lovely ♦️4 in dummy? You end with three spade tricks, three diamond tricks, and two clubs (thanks to a late finesse after getting to your hand with the ♦️5), to make your contract.
The full hand: